Showing posts with label Crafting. Show all posts

Wednesday, October 2, 2013

VERY Quick and EASY Halloween Crafts

The kids are already really into decorating for Halloween.  These days I am into simple, easy and cute crafts!  Here are a few crafts that almost anybody could do with just simple stuff you probably have around the house.  No trip to the craft store required!  Enjoy!

1.  Ghost Garland  (or Bats or Pumpkins)
You need:  Paper, markers, scissors.
We did these, but instead of making them 'linked' we just cut out a stack of ghosts from white typing paper.  The kids gave each ghost a unique face using markers, glue and glitter, and then we taped them to a long piece of twine.
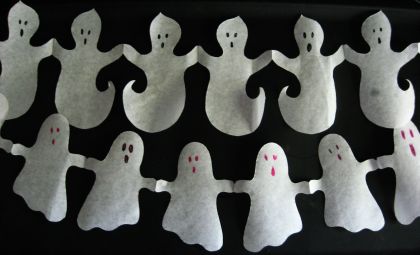
http://www.skiptomylou.org/2008/10/09/paper-ghost-garland/


2.  Paper Plate Masks
You need:  Paper plates, pain or markers, scissors.
http://familycrafts.about.com/od/makingmasks/ss/PaperPlateMaskCraft_8.htm

3.    Monster Magnets
You need:  Bottle caps, googly eyes (or eyes drawn on paper), whatever you can find!
You don't NEED to make them into magnets; use them to play color or sorting games!  But if you have old magnets that need a "refresh", give them a monster makeover!
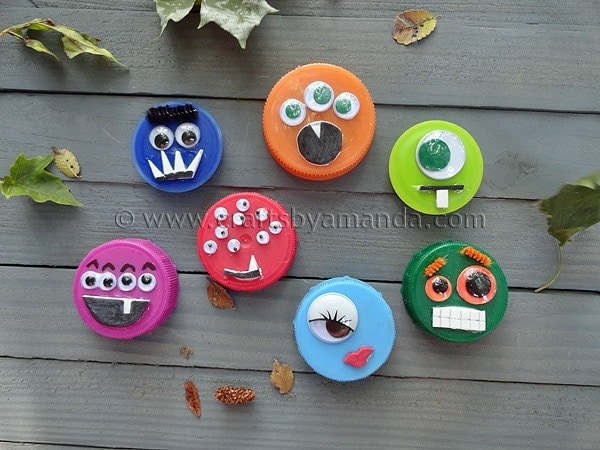
http://craftsbyamanda.com/2011/09/plastic-lid-monsters.html

4.  Coffee Filter Spider Web
You need:  Coffee filters or paper, scissors.
http://artfulparent.typepad.com/artfulparent/2011/10/spider-webs-from-coffee-filters-another-halloween-craft.html

5.  Q-Tip Skeleton
You need:  Dark paper, light paper, Q-tips, scissors.
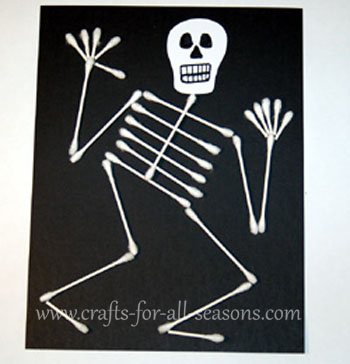
http://www.crafts-for-all-seasons.com/Q-tip-skeleton.html

Saturday, January 12, 2013

A Rapunzel Dress from Goodwill Clothes

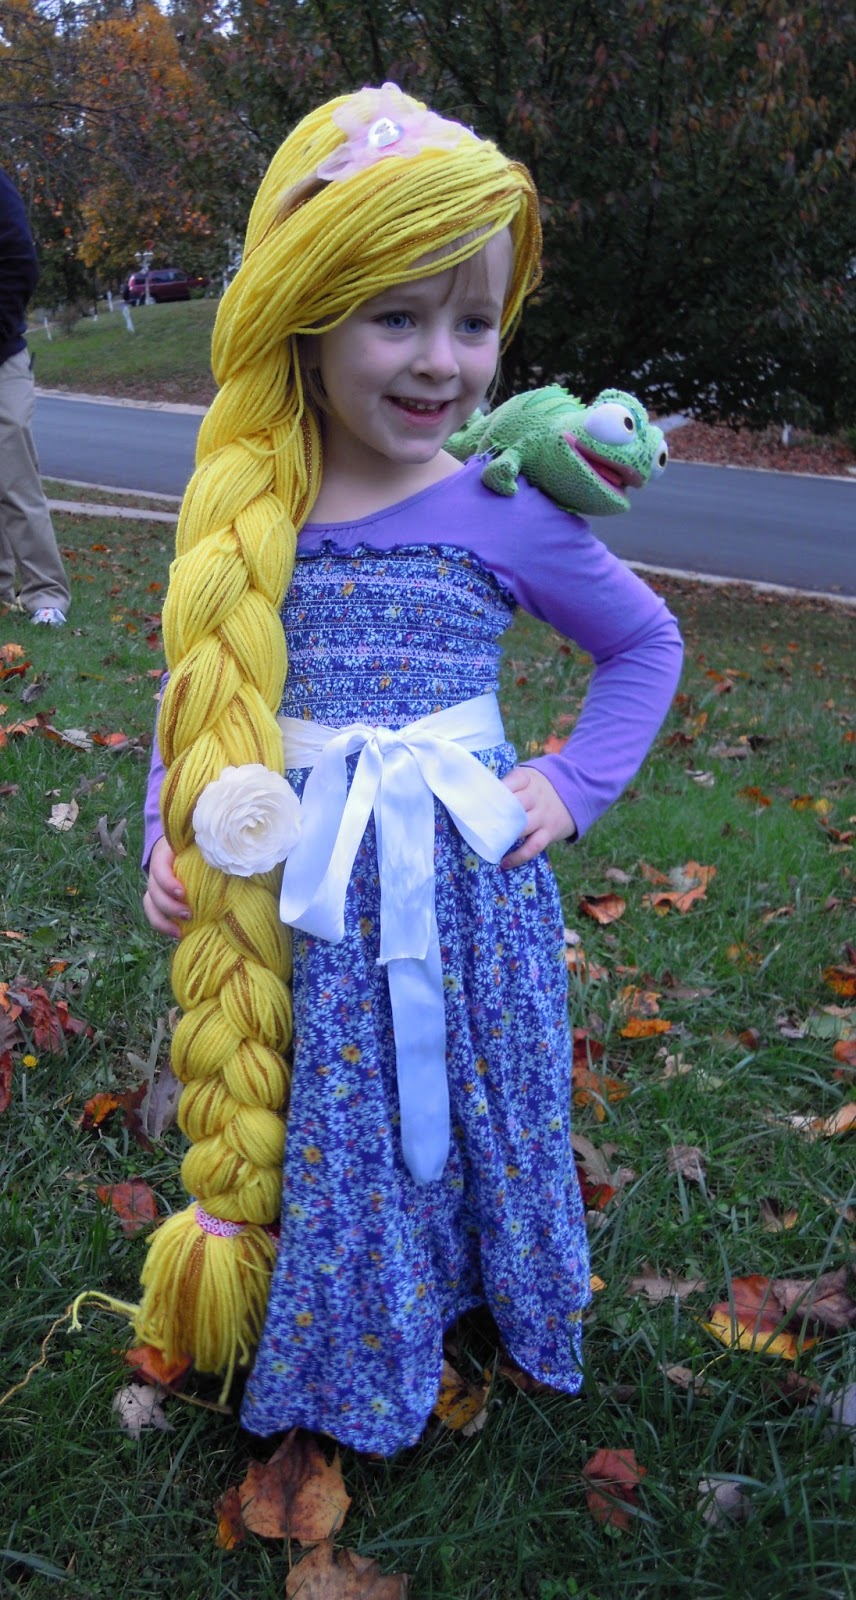
I prepped for this post a little while ago.  It's late.  My camera broke, other life stuff happened, but now I have this awesome Chromebook computer to share how I made Ivy's treasured Rapunzel dress.  Yep, for Halloween, Ivy wanted to be Rapunzel.  I decided to make a dress for her that would be warmer and less commercial than a purchased Rapunzel dress.  Here's how I did it.


  • Skill level:  Easy/Beginner
  • What I used:  A sewing machine; 1 purple long-sleeve shirt (The Children's Place, found at Goodwill); 1 adult size Medium tube-top maxi dress (Old Navy, found at Goodwill).
  • Time commitment:  ~1 hour to go from A to Z:

First, I put the maxi dress on my daughter, up to her underarms.  I pinched the fabric at the seam until it seemed like it would be a comfortable fit.  Then I sewed from the top of the 'pinched' area the same width through the smocked section, and then slowly trailed it off about 1 foot down the dress (not the whole length of the dress).  Finally I cut off the excess.

Next, I laid out the maxi dress and the purple shirt together to create a vision of the final look.  I pinned the top of the smocked/blue dress to the purple shirt at ~1-inch intervals.  HINT:  It helped to line up the seam of the maxi-dress so it's in the middle of the back, because the way I cut off the excess made a nice train.
Then, I sewed (all still right sides out) the smocked dress to the purple shirt.  I used white thread and kept the seam at the very top of the smocked area, on top of another white-ish area so the thread would not stand out.  I sewed around the whole dress twice for strength.  Then I turned the dress inside out and cut off the excess purple t-shirt (the part below the smocked part that nobody would see... although you could leave it on for extra warmth.)

The last step was to cut off all the extra fabric at the base of the dress.  I had Ivy try the dress on, and just eyeball the level we liked.  Then I cut off the excess and hemmed the dress.  The maxi-dress had a lining, and I just hemmed the lining along with the dress.  The lining was not the same width, however, so it made it look a little wavy.  You  may want to hem the dress and lining separately.
Voila!  A long-sleeved, warm, thrift-store, up-cycled Rapunzel dress that my daughter loves, and still wears long after Halloween!  It's versatile enough that she occasionally wears it to school.


Tuesday, October 23, 2012

How To Make a Tractor Costume {Tutorial}

My son is 2 1/2 and only loves his mom, dad and sister more than he loves tractors.  Specifically, John Deere tractors.  He was just born that way, baby.  It was a no-brainer to try to make him a tractor costume!  Here's how we did it!

What you'll need:
-2 medium sized rectangular shaped boxes.
-Scissors
-Serrated knife
-Marker/ Pencil
-Tractor-colored paint of your choice
-Black paint
-Paint brush or sponge brush
-Duct tape or packing tape


Difficulty level:  Not easy, Not hard                  
Time Commitment:  Over the course of several hours and drying overnight
Can kids help?  A little bit

Instructions:
1) Choose your boxes and arrange them the way you want them to be for your tractor.

2) Cut holes in the top and bottom of the larger upright box where the child will stand.  Then, connect the boxes together.  For our tractor, I used the top end flap on the touching end of the shorter box and stuck into the larger box through a cut slot, and taped it inside.  Then I did the same with the bottom end flap like this:


3) Secure all seams with more duct tape!
{Step 3.5:  Have fun with kids playing with the other boxes!}

Step 4) Break out the paint!  We chose to do a fancy stripe.
Step 5) Make the wheels!  I used a dinner plate to make templates.  For the 'small' front wheels, I used the actual plate size.  For the 'large' wheels, I cut a larger circle around the template.


Step 6) Add the wheels and embellish how you like!  We glued on the wheels but I wanted to use brads so they would roll around.  Oh well.  We used duct tape to make fake windows and headlights.  We've also since added shoulder straps by connecting some ribbon to the front and back of the body opening...  but baby boy doesn't like them.  


Step 7) ENJOY!  {And hope and pray the costume makes it to Halloween!  Have a backup plan :).}


Sunday, February 5, 2012

MyMemories for Valentine's Day!


Well... I sat down in front of the computer, after my Wii workout with Ivy (she's much better than I am) and absent an idea of a blog post, I took 10 minutes to create a MyMemories page. Literally - 10 minutes! What do you think? I used the "Back in the Day" paper set that comes with the software, and added a ribbon, a flourish and the words Brother and Sister. It was very easy!

With MyMemories version 3 software, you can also easily make calendars, books, movies and lots of other gifts at very reasonable prices. Perfect for Valentine's Day (or the Superbowl if you think it's a gift-giving holiday)!

I would not promote products that sucked. It is very cool. If you want to purchase the software, use my code
STMMMS40533 and get $10 off the software (making it $29.97) and you also get a $10 coupon to use at the online store! $10 will go far!

Wednesday, December 14, 2011

A Christmas My Memories Giveaway!

It's baaacccckkk! 

I am hosting another MyMemories Suite software giveaway!  The best part is -- I'll be giving away the software on Christmas day - December 25th!  You can enter to win for yourself or a friend or loved one.  

If you haven't checked out MyMemories lately, you should.  They have just released Version 3 of the software and the new features are so much more user-friendly.... which is great because they were pretty user-friendly before!  It flows with how you would naturally make a paper scrapbook page. 

It is easy to import pictures, and there are so many free nicely designed page sets of all sizes that come included!  Also, MyMemories gives away free paper sets regularly.  To the left are just a few pages from one of the included paper sets.  I didn't design these - just did the 'automatic import' option.  I just wanted to give you an idea.  There are tons of cool embellishments like flowers of all colors, buttons, stitching, and so much more.


 To enter this giveaway, simply visit the My Memories Suite webpage, choose your favorite design, and comment below telling me how you'd use the design and the software and you could win a free copy of the My Memories Suite Digital Scrapbooking Software!  SWEET!  (Drawing will be held Dec. 25!)  *BONUS entry if you also become a follower of my blog or LIKE the MyMemories Facebook page!

Here's the best part:  If you can't wait until Christmas, enter the following code to receive a $10 discount off the purchase of the My Memories Suite Scrapbook V3 software and a $10 coupon for the MyMemories.com store - $20 value!   
STMMMS40533 

Tell your friends and family to do this too!  I LOVE giving free stuff away!  Trust me - this is worth it if you love scrapbooking or doing creative projects with photos!

Sunday, November 27, 2011

Semi-Homemade Aurora Crown


My child so badly wants to be a princess some days.  Today was one of those days.  We have princess decals in her room and she always points to either Belle or Sleeping Beauty (Aurora) and says - When I grow up, I'm going to have that hair, and that dress, and hold that thing (a fan) and have a crown like that and be a princess.  It is perhaps the cutest thing ever, since the most recent thing my children did that was the cutest thing ever, like 5 seconds before that.  So today we indulged her a little and made a crown!  And okay, we were both a little bored.... 4 days at home!  A pleasure, and a challenge!  So I googled "aurora crown" and we found this simply adorable pattern.  However, we didn't have craft foam or jewels.... so, enter tin foil!  Here's what we did:  1) Trace the template in the pattern on card board.  Cut out!  2)  Cover it with glue and wrap with tin foil ("silver" as Big Sister called it) 3)  Find a head band that she never wears and glue the 'silver crown' to it, held in place with clothes pins for ~30 minutes 4) In the mean time, make 4 "jewels" by covering diamond (or whatever) shaped pieces of cardboard with tin foil.  Crayons worked okay for giving the 'jewels' a hint of color.   5)  Glue the 'jewels' on the 'crown' in your desired pattern.
Presto create-o!  An aurora crown that Big Sister has worn all day!  And we didn't have to purchase a single thing or make a trip to the craft store!

Tuesday, October 4, 2011

More with My Memories

So - even though I've already given away the free copy of the My Memories software, you can still use my code to get $10 off plus a $10 coupon for the online store.  I should be sleeping but instead I'm playing!  Look what I did in the past 20 minutes or so.  I didn't have in mind what I wanted to do, but I took a few pictures from a trip we took in the early Spring to UNC Chapel Hill.  I like the way it turned out....  this was one pre-designed page of a 5-page album but I changed the photo layout very easily, adjusted the photos to black and white and added the word "family."  What do you think?  Pretty cool huh?

The code to get the discount is STMMMS40533 on the My Memories Suite webpage.  

It would be great for making a Holiday letter, wedding album, baby album, calendar for a gift and much more!

Saturday, September 24, 2011

We have a winner!

Congratulations, Amy!!  You have won my first giveaway - a free copy of the My Memories Suite software!  I loved how you said you would use it, to make a baby book for your daughter.  I am so excited you get to do that now.  I will send you your code soon - please report back about how you liked it!

For those of you who didn't win, fret not!  My $10 code is still good and $29.97 is a steal for this software.  I played with a little more tonight and was able to download 12 free pages and sets for free -- but there were over 50 to choose from!  These items alone would have easily cost $30 in a craft store.

The code to get $10 off plus a $10 store coupon is STMMMS40533!  

Thanks to everybody who entered -- and good night!

Friday, September 16, 2011

More Fun with My Memories - and a Rule Change!

Ok.  Clearly I am not in sleeping mode tonight.  Plus it's a Friday night and what better way to party in my jammies than to play with the My Memories Suite scrapbooking software?  Let the good times roll!

But seriously - Look what I've done!  I did these pages in about 15 minutes.... plus my cool new banner for my blog (see top of page).  I am feeling pretty positive about my creative crafting skills right about now!  I used a template for a whole book that had about 10 pre-designed pages...  but you don't have to use them all and you can change the layout and add words, embellishments, ribbons, bows, more photos... and it's super easy to use.  If you can use a computer, you can figure it out without a manual.


Also I've changed the rules for my FREE giveaway!  I can't wait until September 30, I'm too excited!  So I'll give away the My Memories software to a lucky reader once I get 1500 page views on my blog so spread the word!  If you'd love to have the software and haven't done so yet, visit the My Memories Suite page, pick a layout you love and 'comment' on my blog telling me how you'd use it.  Extra 'entries' for following my blog and 'liking' the My Memories facebook page!  (You have to tell me you did that).  Also make sure I know who you are when you 'comment' :)

Finally - if you can't wait or don't win, use my CODE to get $10 off the software PLUS a $10 store coupon - a $20 value!  That's $29.97 after the coupon!  A great deal.  The code is STMMMS40533. 

Good luck - and good night!  I'm going to bed!

Wednesday, September 14, 2011

Digital Scrapbooking with My Memories - My First Giveaway!

You may not know that I love scrapbooking.  Over the years I've made quite a few but when Big Sister and Baby Genius came along, all scrapbooking ceased.  What's sad is this is the time when I really wish I could do more of it to put the HUNDREDS of pictures we take to good use AND compliment my journaling with beautiful photo books.

{Insert a shout-out to my mom, who has made several scrapbooks for me and my kids!  But there's just something about doing it yourself... you know?}

Enter:  MyMemories Suite Software.  I am flattered that they found my blog and approached me to try it out and tell people about it.  It is the coolest thing!  Look what I made in less than 10 minutes.  It was super easy, fun and fast.  I would not lie to you.  And the coolest part is I can print it, download it, email it, make a book, a JPG, share it on Facebook or whatever!  There are lots of pre-set pages or you can design your own; there's a nice selection of embellishments, paper choices, and so much more! 


The price is pretty decent too - $39.97 for the software (or $29.97- keep reading!).  I once tried one of those online upload-your-photos and make a memory book.  I had a Groupon and still paid something like $30 for the small, basic book.  For almost $40 you can make unlimited pages - a much better deal - AND you can make books, calendars, movies....  lots of cool things!  This would be a GREAT tool to make home-made Christmas cards and gifts!  (Think... calendars for the grandparents...)  Truly if this is your 'thing' you should check out the website:  My Memories Suite.


Here's the best part:  For my readers, enter the following code to receive a $10 discount off the purchase of the My Memories Suite Scrapbook software and a $10 coupon for the MyMemories.com store - $20 value!  STMMMS40533! 

But Wait!  There's More!  I also have a FREE giveaway for a lucky reader!  Simply visit the My Memories Suite webpage, choose your favorite design, and comment below telling me how you'd use the design and the software and you could win a free copy of the My Memories Suite Digital Scrapbooking Software!  SWEET!  (Drawing will be held Sept. 30!)  *BONUS entry if you also become a follower of my blog or LIKE the MyMemories Facebook page!


Tell your friends and family to do this too!  I LOVE giving free stuff away!  Trust me - this is worth it if you love scrapbooking or doing creative projects with photos!

Monday, January 31, 2011

We Miss "The Good Night Show" on Sprout

When Big Sister was much smaller, she loved a lot of things, but most of all she loved (not including her family of course) Elmo and Sprout's "The Good Night Show" with Star and Nina.  It makes me very sad to think that a) she has lost interest (mostly) in Elmo and b) that we don't get Sprout with our new cable provider.  Baby Genius will have to love it online.

But...  we did a craft for my husband's birthday and I found the instructions on The Good Night Show website!  And bonus, there's a great list of other crafts to do with young 'uns!  Click here for a link to a very easy Stained Glass jar craft from Nina and Star.  (Note:  the picture isn't of the one we did but it looked very similar.)

Big Sister and I had several suggestions/variations:

1) In the spirit of Reuse/Recycle, we used a clean baby food jar!  It's a great size for something like holding a tea light, spare change in the laundry room, paper clips on a desk, etc.

2) We did a 1/2, 1/2 water and glue mixture... it was easier for Big Sister to "paint" on the jar.

Enjoy!